Overview
Managing users and their access levels is a key administrative function in Noble Content Lab. This guide will walk you through the process of inviting new users and adjusting permissions for existing team members.
Accessing User Management Settings
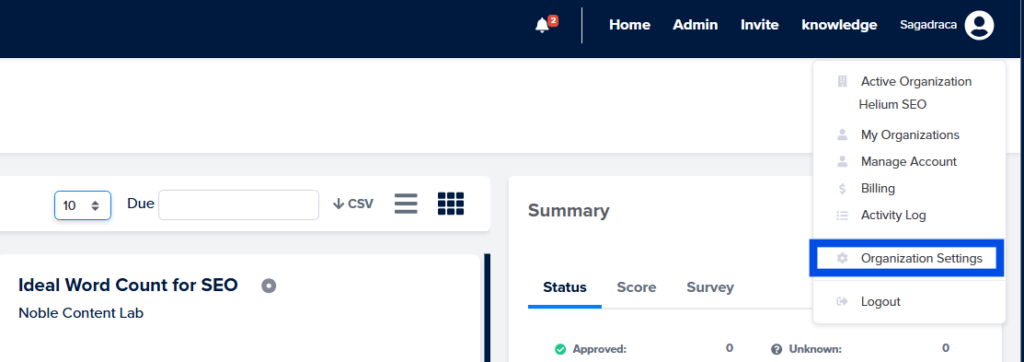
- Navigate to Profile Settings:
- Locate and click on the Profile icon in the top right corner of your screen
- A drop-down menu will appear with various options
- Access Organization Settings:
- From the dropdown menu, select “Organization Settings”
- This will take you to the organization configuration area
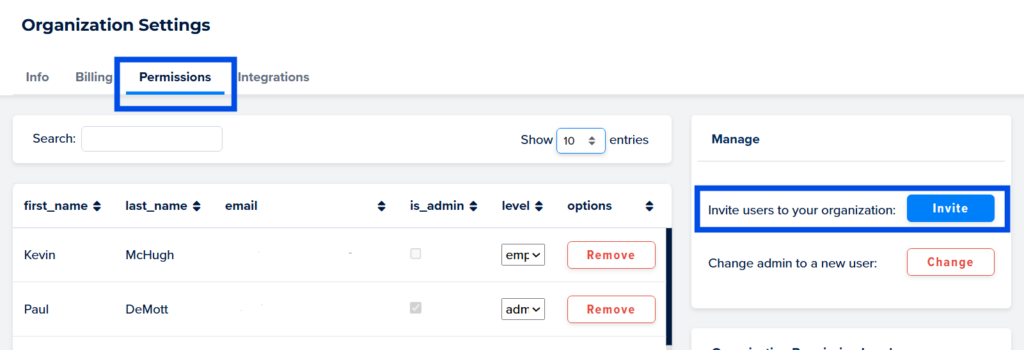
- Go to the Permissions Tab:
- Within Organization settings, navigate to the “Permissions” tab
- This tab contains all user management functionality
Understanding User Roles
Noble Content Lab offers four distinct user roles, each with specific access levels and capabilities:
Admin
- Access Level: Complete system access
- Permissions:
- Can view and edit all content throughout the organization
- Has full access to organization information and settings
- Can access and manage billing information
- Can modify organization details and branding
- Can adjust account permissions for all users
- Can create, edit, publish, and delete any content
- Can invite new users and change role assignments
Employee
- Access Level: High-level content access
- Permissions:
- Can view and edit all content throughout the organization
- Has access to organization information and settings
- Cannot access billing information
- Can create new content from scratch
- Can edit existing content across the platform
- Cannot change organization-level settings
Content Creator
- Access Level: Author-specific access
- Permissions:
- Can only access content where specifically assigned as the author
- Cannot view or edit content created by others
- Can create new content from scratch
- Can fully edit their own content
- Cannot access organization settings or information
Writer
- Access Level: Limited author access
- Permissions:
- Can only access content where specifically assigned as the author
- Cannot view or edit content created by others
- Cannot create new content from scratch
- Can only edit existing content where assigned
- Cannot access organization settings or information
Inviting a New User
- Navigate to the Permissions Tab as described above
- Initiate User Invitation:
- Look for an “Invite” button within the Permissions tab
- Click this button to begin the invitation process
- Complete the Invitation Form:
- Enter the new user’s email address
- Select the appropriate role from the dropdown menu (Admin, Employee, Content Creator, or Writer)
- Add a personalized message if desired (optional)
- Review the information for accuracy
- Send the Invitation:
- Click “Send Invitation” or “Submit” to deliver the invitation
- Important Time Limitation:
- The invited user has exactly one week (604,800 seconds) to accept the invitation
- After one week, the invitation expires, and you’ll need to send a new one
Changing Existing User Access
- Navigate to the Permissions Tab as described above
- Locate the User:
- Find the user whose permissions you want to modify in the user list
- Edit User Role:
- Select the new role from the dropdown menu under the level column
- Once you select a new level, the change will automatically save
Best Practices for User Management
- Regularly audit user access levels to ensure appropriate permissions
- Remove access for users who no longer need it
- Assign the minimum level of access required for each user to perform their job function
- Consider creating documentation to explain the responsibilities associated with each role
- Notify users when their access level has been changed
Troubleshooting
- If a user reports not receiving an invitation, check spam folders or resend the invitation.
- If a user needs immediate access and their invitation has expired, you’ll need to send a new invitation.
- For users having difficulty with their assigned permissions, verify their role assignment is correct.
For additional assistance, contact your Noble Content Lab administrator or support team.